http://tuxgraphics.org/electronics

Windows: AVR microcontroller programming in C
![[Illustration]](../../common/images2/article12051/win-avr.jpg)
Abstract:
The avr-gcc chain of tools to program AVR microcontrollers was originally written
for Linux but there are actually more people who use this environment under Windows.
Windows is a very bare-bone system when it comes to programming. Everything, even
a decent text editor, has to be installed on top.
There are however a
lot of good and free applications available for Windows.
Some of the essentials are
available in the download section of this article. The software suggested here
was tested on Windows XP and Windows 7 and will probably work on many other windows flavors.
_________________ _________________ _________________
|
The avr toolchain
In the past the avr-gcc environment to use for windows used to be available at
http://winavr.sourceforge.net/download.html.
Winavr is however no longer maintained because Atmel them self distribute
the software now under the name "Atmel AVR Toolchain for Windows" at:
http://www.atmel.com/tools/ATMELAVRTOOLCHAINFORWINDOWS.aspx.
Note: after Atmel was purchased by Microchip the above site seems to have moved to https://www.microchip.com/en-us/development-tools-tools-and-software/gcc-compilers-avr-and-arm#
Atmel wants you to fill out a registration form and after that they allow you to download it.
The software is however free open source software. A link to copies of those images is available at the end of this article. This is to ensure that the article remains valid even if Atmel should change the software in future. The software is packed into a windows
installer and it will normally install itself somewhere under
"C:\Program Files\Atmel\AVR Tools\AVR Toolchain" with the actual tools and the compiler
being in "C:\Program Files\Atmel\AVR Tools\AVR Toolchain\bin". Besides the compiler there
is a "make" command, the "avrdude" programmer software and a number of other commands normally part of Linux to ensure
compatibility with the same environment under Linux. This way one can write software and makefiles
that can be used "as is" under both Linux/Mac and Windows.
The windows installer for the Toolchain updates the search PATH environment such that
any of the commands are available by just using the command name (like e.g avrdude).
You can verify that by opening a dos shell (cmd) and printing the PATH:
echo %PATH%
The PATH is under windows a semicolon separated list and "C:\Program Files\Atmel\AVR Tools\AVR Toolchain\bin" (or
wherever it was installed) should be somewhere in that list.
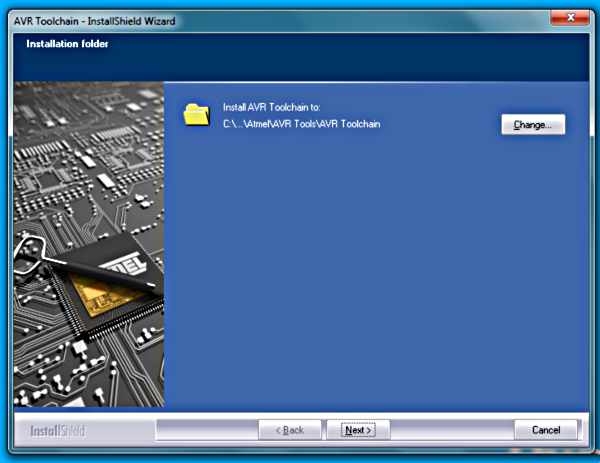
Installing Atmel AVR Toolchain for Windows
A decent text editor
To write software you will need a good text editor.
The standard windows notepad editor can not be used if the code was written on other systems such
as Linux and Mac. You want as well an editor that supports syntax highlighting
for C-code as it makes it a lot easier to read and write C-code.
A good editor is http://notepad-plus-plus.org/. It's free and
does a good job. A minimal installation of notepad++ is available in the download section of this article.
Just extract the zip file somewhere and create a shortcut from notepad++.exe to your desktop.
After that you can drag-and-drop c-code files from your file-manager onto the notepad++ icon and edit them.
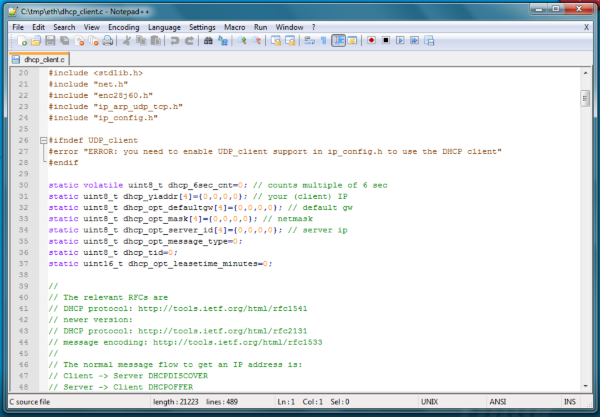
Using notepad++ to edit code
Unpacking tar.gz files
Here at tuxgraphics we distribute all software as tar.gz archives. Plain windows has an archive
extraction function in its file manager but it can not unpack tar.gz.
There are however a number of archivers that can handle tar.gz such
as 7zip (http://www.7-zip.org/) and you find a free tar.gz extractor called unTarGz (based on the free software tartool) in the
in the download section of this article. Just follow the installation instructions of unTarGz in the included Readme file.
Avrusb500 and avrdude under windows
The tuxgraphics Avrusb500 is a stk500v2 compatible programmer and it will work with almost any
programmer software. Not just avrdude but we use here avrdude because it is very good and part
of the avr toolchain.
The Avrusb500 programmer requires under windows the installation of a driver and you can download it at
http://www.ftdichip.com/Drivers/VCP.htm.
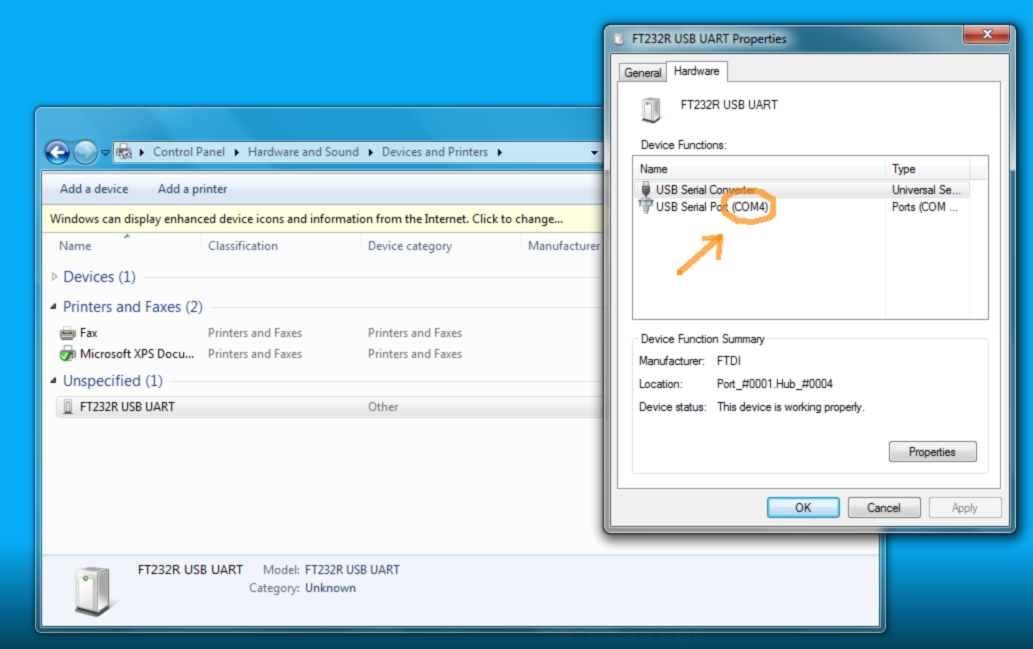
After that the Avrusb500 will show up as a COM-port.

COM port number for Avrusb500
Note down the com-port number. You will need it later when installing the win-avrdude
programmer software.
The programmer software avrdude is very powerful however it is meant to be used on the command line or from within
makefiles.
The command line, aka. dos shell (cmd), is not very developed under windows. It is however possible
to write some batch scripts to do programming with a simple drag-and-drop. Just drag-and-drop
the compiled code (.hex file) onto a desktop icon and it will be loaded into the microcontroller.
Download
the win-avrdude zip-file from the download section and follow the instructions
included in the readme file (you will need the COM port number of your avrusb500).
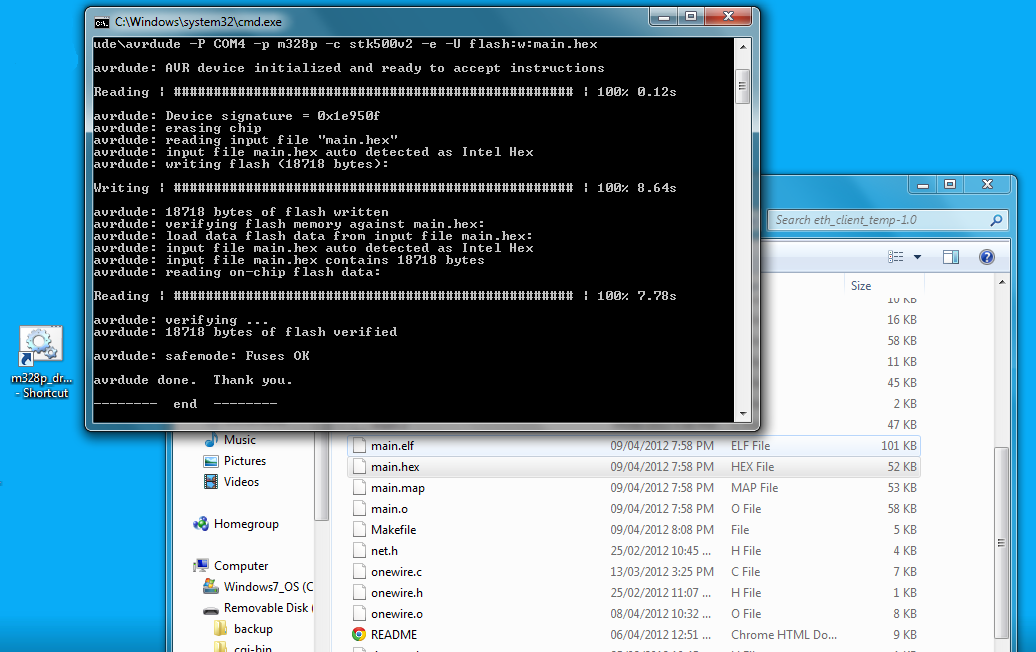
Using it is really easy. Just drag and drop the .hex file onto the icon:
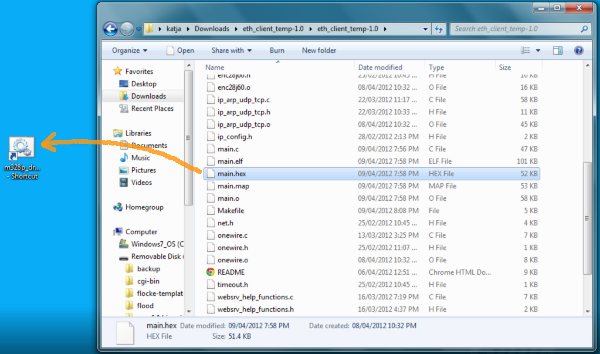
Drag the file on to the m328p_dragdrop.bat short-cut on the desktop
This will start programming the microcontroller using avrdude and all diagnostic
output will appear in a black window that pops-up.
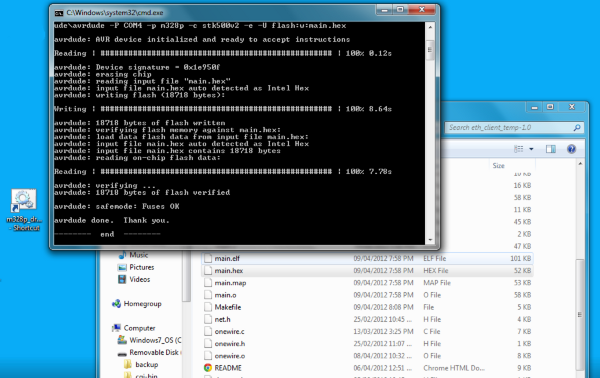
The black dos-shell diagnostic window shows the progress during programming.
Included in the win-avrdude zip-file from the download section is as well
a script called m328p_rdfuses.bat. It reads the so called fuse settings
of the microcontroller. You just double click it:
Fuses are a bit like the bios on a PC they determine hardware related
start-up settings:
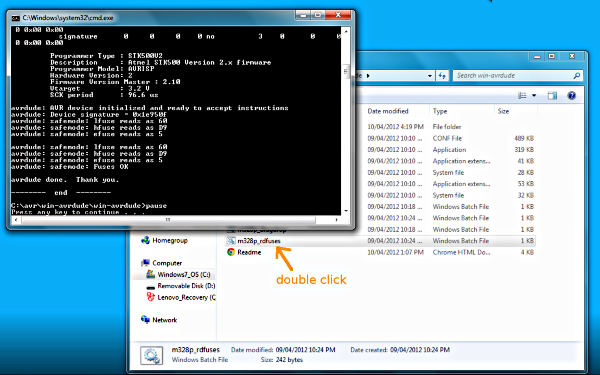
Reading the fuses of an atmega328p microcontroller
Makefiles
We have an own article about Makefiles and I recommend reading
it later. To just get started it is enough to know that we use
at tuxgraphics makefiles for every project and you can use them
to compile the code no matter whether you are using Windows, Linux
or a Mac.
Makefiles define a set of rules for something called a "make target".
By convention there is normally a make target called "all" and it
just compiles all the code. We define normally the following make targets:
- all -- compile all code
- fuses -- write the fuse settings as recommended for this particular project.
- rdfuses -- read current fuse settings (alternatively you can use the
m328p_rdfuses.bat explained above)
- load or load_something -- to program a given hex file into the
microcontroller (alternatively you can use the drag-and-drop programming shown
above)
- clean -- delete all generated object files (must be run after you changed settings in the Makefile itself).
- help -- print an explanation about the available make target
The most important thing here is the "all"-target that compiles all code. Make is supposed to be used
on the command line (aka dos shell, cmd).
You would "cd" into the directory where the "Makefile" is (next to the code)
and then run:
make -f Makefile targetName

It is possible to abbreviate that command and just type:
make targetName

The "make all" can be abbreviated to just:
make
With the limitations on
windows I have observed that people are more looking for a way to do things
with the mouse. Therefore we include with every microcontroller software a batch script
called winmake.bat and that will just run "make all" (aka compile the whole
thing). As the tool chain for windows has changed over time from
winavr to "Atmel AVR Toolchain for Windows" there might be some adaptations
needed. Here is how such a winmake.bat script should look like:
@REM *** you need to edit this file and adapt it to your AVR
@REM *** installation. Change the PATH

@echo -------- begin --------

@set PATH=C:\Program Files (x86)\Atmel\AVR Tools\AVR Toolchain\bin;%PATH%

make -f Makefile

@echo --------  end  --------
pause
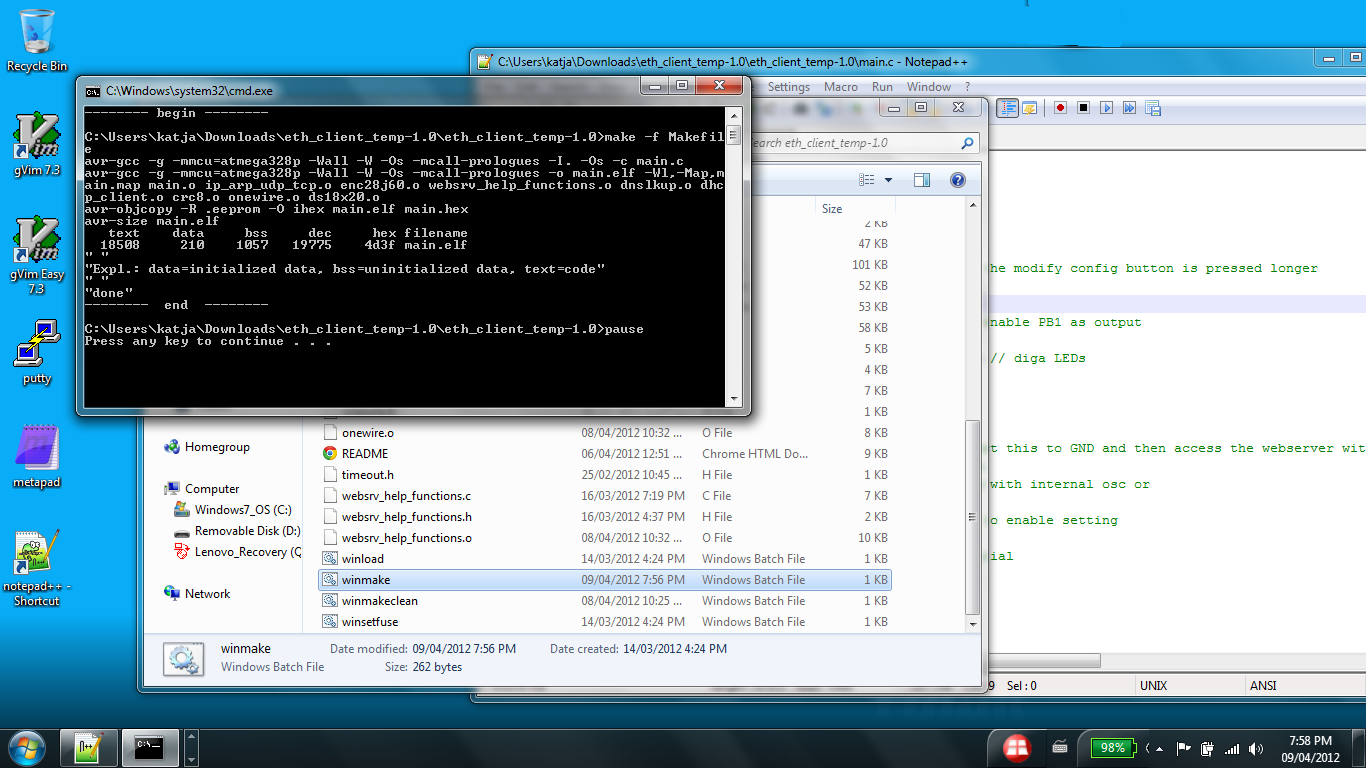
Now you can compile the code just by double-clicking on the winmake.bat
A black window will pop-up and any errors are shown in that window:
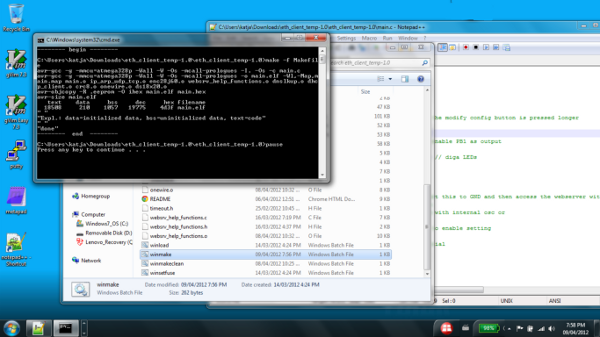
Compiling all code by double-clicking on winmake.bat
If you would like to use any of the other make targets then just make
a copy of that winmake.bat file (e.g clean.bat) and change the make line
from
make -f Makefile
to
make -f Makefile clean
... or whatever other make-target you would like to run.
In a number of projects (e.g when there is a choice of microcontrollers
that can be used) you will have to change and adapt some variables
at the top of the Makefile:
# Please select according to the type of board you are using:
MCU=atmega328p
DUDECPUTYPE=m328p
#MCU=atmega644
#DUDECPUTYPE=m644
#MCU=atmega644
#DUDECPUTYPE=m644p
#
In this case you can e.g use as well a board that has
a atmega644 chip. In that case you would comment out (put a "#")
in front of the atmega328p/m328p lines and remove the comments from
the lines with atmega644/m644.
There is as well a section in the Makefile to adapt programmer related settings.
This needs to be changed if you would like to load the code using the
makefile (instead of the drag-and-drop programming described earlier) or
you would like to set the fuses using the makefile.
# === Edit this and enter the correct device/com-port:
# linux (plug in the avrusb500 and type dmesg to see which device it is):
#LOADCMD=avrdude -P /dev/ttyUSB0

# mac (plug in the programmer and use ls /dev/tty.usbserial*
# to get the name):
#LOADCMD=avrdude -P /dev/tty.usbserial-A9006MOb

# windows (check which com-port you get when you plugin the avrusb500):
LOADCMD=avrdude -P COM4
That's it! You are good to go
This is really all you need for avr-microcontroller programming.
If you feel that you would rather like to work with a C-programming
IDE (integrated development environment) or avrstudio then
just install them.
I personally find that all the IDEs are really a bit of overkill.
Microcontroller code is generally small because the chip is small and
it it more important to have a good knowledge about writing efficient
code in C.
Functions that are not just plain C but specific to the
avr-microcontroller are documented in the
Modules index of the avr-libc user manual
The documentation that comes with the library is very good it
is worth while to look at it if you want to do some serious programming.
The full avr-libc manual is as well available in the download section of this article.
This document was written with tuxgraphics applications and code in mind.
References/Download
© Guido Socher, tuxgraphics.org
2014-07-26, generated by tuxgrparser version 2.57